Vibratory Bowl Feeder Spring Tuning Guide 2026
Why spring tuning decides feeder performance
When a vibratory bowl feeder loses speed, runs hot, or starts sounding harsh, many teams go straight to the controller. Sometimes that is the problem. Often it is not. In day-to-day production, spring tuning is what separates a feeder that glides parts up the track from one that fights itself for every millimeter of motion. The bowl, base, springs, armature, and load all work as one vibrating system. If that system is out of tune, the feeder can still run, but it will waste power, build heat, and produce unstable feed rates.
A well-tuned feeder reaches the target feed rate before the controller is pushed to its limit. On most electromagnetic bowl feeders, that means rated output is reached with some headroom left, not with the knob or digital setpoint pinned near 100%. If the feeder only behaves at full power, you are usually looking at an overtuned or undertuned spring pack, an air gap problem, or a load condition that was ignored during setup.
This guide walks through a practical tuning sequence based on what technicians actually check on the shop floor: controller output, spring condition, air gap, bowl load, and the amplitude response curve. For first-time setup work, read our vibratory bowl feeder installation guide. For machines that already jam or misfeed, the troubleshooting guide is the best companion.
When a feeder needs spring tuning
Most feeders do not drift out of tune overnight. The change is gradual. Feed rate drops a little, operators turn the controller up, then the coil runs warmer, noise goes up, and the line becomes sensitive to bowl fill level. A feeder in this condition still moves parts, but it has lost its operating margin.
These are the field symptoms that justify a tuning check:
- Controller output is too high: rated feed rate needs 85-100% output instead of roughly 60-75%.
- Speed changes with bowl fill: the machine runs acceptably half full, then slows sharply at full load.
- Sound changes: a tuned feeder has a steady hum, while an overtuned feeder often sounds stiff and metallic.
- Parts bounce or fall back: unstable motion points to undertuning, excessive amplitude, or a bowl-track mismatch.
- Coil temperature rises too fast: if the drive works hard to create ordinary motion, spring tuning is usually part of the story.
One point matters more than many teams expect: final tuning must be checked with a representative load. Empty-bowl tuning can get you close, but the part mass shifts the natural frequency. On medium and large bowls, the difference between empty and loaded operation is enough to move a good setup into the wrong zone.
What the spring pack is really doing
A bowl feeder is a single-degree-of-freedom vibrating system. The spring pack provides stiffness, the bowl and carried parts provide mass, and the electromagnetic drive provides the periodic force. The feeder runs best when the natural frequency of that spring-mass system sits close to the drive frequency used by the controller.
The basic relationship is simple: natural frequency increases when spring stiffness goes up, and it drops when moving mass goes up. In practice, that means adding spring leaves raises the system frequency, while adding product load lowers it. That is why a feeder that feels fine empty can become lazy once the bowl is filled for production.
Technicians do not usually calculate the full spring constant in the field. They rely on the response curve instead. If the bowl stays dull and slow until the controller is pushed high, the spring pack is too stiff for the working mass. If the bowl jumps into large motion too early and parts start bouncing, the spring pack is too soft or the controller setting is too aggressive for the tooling.
| Condition | What you see | Likely cause | Typical action |
|---|---|---|---|
| Overtuned | Slow amplitude rise, harsh sound, high controller output needed | Too much spring stiffness for the mass | Remove one matched leaf from each spring bank and retest |
| Undertuned | Large motion too early, unstable bounce, parts jump off track | Too little spring stiffness or too much amplitude | Add one matched leaf to each bank or reduce output before retest |
| Near target | Smooth response, steady sound, stable loaded feed rate | Natural frequency close to drive frequency | Keep setup and document baseline settings |
If your plant runs multiple bowl sizes, document the acceptable output window for each machine family. That helps operators spot a drifting drive before production quality drops.
A step-by-step tuning procedure that works on the floor
The cleanest tuning sequence starts with the obvious checks first. There is no point changing springs if the coil air gap is wrong or a spring leaf is already cracked. The process below is slower than guesswork on the first pass, but faster over the life of the machine.
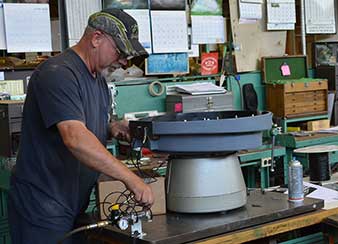
- Lock out the feeder and inspect the spring packs. Look for cracked leaves, rust at clamp points, bent stacks, missing spacers, and witness marks that show slippage. Replace damaged leaves before tuning. Do not mix fresh and fatigued leaves in the same bank.
- Verify clamp hardware. Loose spring bolts change effective stiffness. Over-tightened bolts can damage the leaves and create repeat failures. Follow the supplier torque spec. If no machine-specific value is available, treat the published spring-bolt torque range in your manual as the upper limit, not a suggestion.
- Check the coil air gap. On many bowl feeders, the resting gap is about 0.5-1.0 mm. Too small and the armature can strike. Too large and the magnetic pull falls off, which makes the drive look weak even when the springs are fine.
- Run the feeder empty and record the response. Start from minimum output and increase in small steps. Watch how quickly amplitude builds and listen for noise changes.
- Load the bowl to about 50% of rated capacity. Repeat the same ramp. Then test again at full production fill. This is where hidden detuning usually shows up.
- Change springs symmetrically. If you add or remove leaves, do it on every spring bank so the drive stays balanced. One-sided changes create strange track motion and often cause parts to drift or rotate unpredictably.
- Retest after every change. Spring tuning is incremental work. One leaf per bank can be enough to shift the machine from poor behavior to stable operation.
A good target is straightforward: the feeder should hit production rate with stable motion and some spare controller range left for minor lot-to-lot variation. If the machine reaches the number only at the edge of its range, keep tuning. That edge never lasts long on a real line.
How load changes the tuning result
Load-based tuning is where many feeder setups are won or lost. The bowl may look healthy during commissioning because it was tuned with no parts, a small sample lot, or a bowl fill level far lower than the line sees during real production. Once operators top the bowl up, the system slows down and the controller gets blamed.
As a rule, use three checkpoints during validation:
- Empty bowl: confirm clean motion, no strike marks, and no abnormal noise.
- Half load: verify the machine reaches target feed rate without a sharp jump in controller demand.
- Full load: check whether feed rate stays within about 10% of the half-load result.
If throughput collapses as the bowl fills, the system is often too soft under mass or the tooling section is creating drag. Before adding springs, inspect the track for coating wear, contamination, or selector geometry that is too restrictive. The issue is not always in the drive. Our tooling design guide covers how track details can consume the motion you worked hard to create in the base.
This is also where operator habits matter. A bowl that performs best at one-third to one-half full should not be run brim-full just because the hopper is nearby. Build the tested fill range into the standard work sheet and train the line accordingly.
Common tuning mistakes that create repeat downtime
The fastest way to make a feeder harder to diagnose is to change several variables at once. Remove two leaves, move the air gap, swap the controller setting, and now nobody knows what fixed the issue or caused the next one.
- Changing springs without measuring the baseline: always record controller output, bowl load, and observed feed rate before touching hardware.
- Replacing one spring leaf only: mixed stiffness in the same bank causes unbalanced motion and short spring life.
- Ignoring the air gap: a weak magnetic drive can look exactly like detuning if you never inspect the gap.
- Tuning to maximum speed only: the fastest setting is useless if orientation collapses or parts bounce out of the track.
- Letting operators mask the issue: repeated controller increases usually hide a mechanical drift that will return later as heat, noise, or spring failure.
Noise is a particularly good warning sign. If the feeder gets louder as output rises, do not assume more power is the answer. Check mounting, springs, and coating condition before the problem becomes a breakage event. We cover the mechanical side in more detail in our guide on reducing vibratory feeder noise.
What to record after tuning is complete
Once the feeder is stable, document the working condition. This takes ten minutes and saves hours later. The record should include spring stack configuration by bank, air gap, controller output at empty and loaded states, observed parts per minute, and any notes about preferred bowl fill level. If the controller supports saved recipes, note the recipe name and the locked parameter set.
Teams that keep this baseline can spot drift early. A feeder that once ran 180 parts per minute at 62% output but now needs 78% is telling you something, even if production has not stopped yet. That trend is often the earliest sign of spring fatigue, fastener relaxation, coating wear, or a part change that was not formally reviewed.
Huben Automation usually recommends adding a quick tuning check to the preventive maintenance plan for feeders that run multiple shifts. A short baseline test every few thousand operating hours is far cheaper than chasing random downtime on a busy line. If your current feeder has no stable operating margin, contact us and we can review the drive, bowl load, and tooling package against your target rate.
Ready to Automate Your Production?
Get a free consultation and detailed quote within 12 hours from our engineering team.


