Feeding Stamped and Laser-Cut Parts: Burr Management and Orientation Guide 2026
Stamped and laser-cut parts look flat on the drawing but behave unpredictably in bulk
Feeding stamped and laser-cut sheet metal parts is a challenge that combines geometry ambiguity, edge condition sensitivity, and surface protection requirements. A flat part with a simple outline may rest in five or six different stable poses when dumped into a bowl. Burr direction, micro-joins from the cutting process, and residual oil all compound the problem.
Whether the parts come from a progressive die stamping line or a laser-cutting bed, the stamped parts feeding decision hinges on the same three questions: how many stable poses exist, what is the edge condition, and what presentation does the downstream station require. This guide covers the practical engineering details for teams designing or specifying a laser cut parts vibratory feeder or a bowl feeder for stamped components.
This article connects with our coverage of feeding oily parts, vision-guided flexible feeding, and plastic parts feeding for mixed-material assembly lines.
Why flat parts create more poses than expected
Flat parts seem simple because they are two-dimensional in design. But a two-dimensional outline in bulk motion has many more stable states than a three-dimensional part. A flat stamped bracket can lie face-up, face-down, edge-on, or tilted against another part. An irregular outline with tabs, slots, or asymmetrical cutouts adds rotational ambiguity on top of the face ambiguity.
The number of stable poses determines the orientation strategy. Parts with one clearly dominant face (for example, a curved or domed side) can use gravity to settle into one position. Parts that are truly flat on both sides need a mechanical or vision-based system to resolve the face-up versus face-down question.
For stamped parts, the die side and the stripper side often have slightly different surface textures. A well-designed bowl track can exploit this texture difference to guide one face up. For laser-cut parts, both faces are typically identical, so the orientation strategy must rely on edge geometry, a chamfer, or a vision system at the pickup point.
| Part type | Stable poses | Face symmetry | Orientation difficulty | Recommended approach |
|---|---|---|---|---|
| Flat washer-like stamping | 2 (face up/down) | High | Low | Bowl with face selector or brush |
| Asymmetrical bracket | 4-6 | Low | Medium | Progressive track selectors |
| Flat laser-cut gasket | 2 (face up/down) | High | Medium | Flexible feeder with vision flip |
| Laser-cut tabbed part | 3-5 | Low | High | Flexible feeder, robot pickup |
| Embossed stamped part | 1-2 | Low | Low | Bowl with dome-down gravity orient |
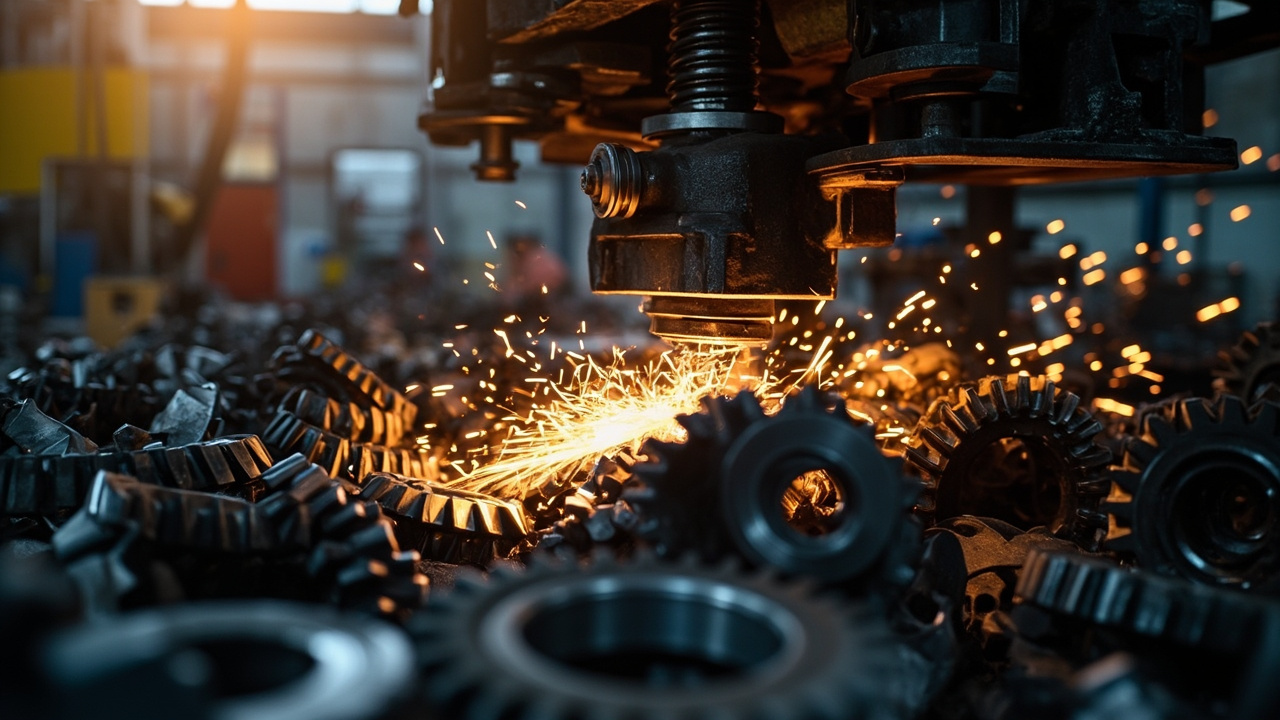
Burr direction: the hidden variable in part feeding
Burr direction is one of the most overlooked factors in flat part feeding. Every stamped or laser-cut part has a tool side and a die side, and the burr always forms on one specific face. When parts are dumped into a bowl, the burr side tends to catch on track surfaces, on other parts, and on selector edges. This creates a natural bias that can either help or hurt orientation depending on how the track is designed.
For parts where the burr is on the same face for every piece, the feeder can use the burr deliberately. A slightly raised rail or a brushed surface will catch the burr side and flip parts into the desired orientation. This works best when the burr height is consistent, which is true in well-maintained progressive die stamping lines.
For laser-cut parts, the burr is typically on the bottom face (the exit side of the laser beam). It is usually smaller and more uniform than a stamping burr, but it still creates a texture difference that a well-designed track can exploit.
When burr direction is inconsistent or the burr height varies across the lot, the feeder cannot rely on it as an orientation mechanism. In these cases, the track must be designed to tolerate the burr without catching, and orientation must be handled by other means such as edge profiling or vision verification.
For lines where burrs are unacceptable at the downstream station (for example, parts that go into a press-fit or adhesive bonding operation), an upstream deburring or tumble-finishing step should be included in the feeding cell design.
Separating micro-joined parts from the cutting process
Laser-cut parts often arrive with micro-tabs or micro-joins that hold the part to the skeleton sheet. These connections are strong enough to keep the part from falling free, but weak enough to break during handling. In a feeding context, micro-joins cause two problems.
First, parts that have not fully separated from the skeleton create tangles. A group of partially connected parts moves through the bowl as a cluster and cannot be oriented individually. Second, parts that break free mid-track leave behind sharp skeleton fragments that contaminate the bowl and create jam conditions for subsequent parts.
The solution depends on the cutting process. If the laser cutter includes a part-knockout station, the skeleton should be removed before the parts reach the feeder. If micro-joins are still present, a gentle vibratory pre-separation stage can break the remaining connections before the parts enter the orientation bowl. This pre-separation stage uses lower amplitude and a wider track to encourage breaking without damaging the parts.
For stamped parts from a progressive die, the skeleton is typically separated at the die itself. But small cutouts and slug remnants can carry over into the part bin. A magnetic separator or a mesh-screen pre-sorter removes these contaminants before the feeder receives the parts.
Sheet-fed versus bowl-fed: choosing the right approach
The fundamental decision for stamped and laser-cut parts is whether to feed from bulk (bowl-fed) or from a stacked sheet format (sheet-fed). Each approach has distinct advantages.
Bowl-fed systems handle parts that are dumped in bulk, oriented mechanically or visually, and presented one at a time. They are ideal for high-volume, single-variant production where the part geometry is stable and the orientation can be solved with track tooling or a vision pick cell.
Sheet-fed systems handle parts that arrive stacked or layered, typically on a magazine or pallet. A sheet-fed feeder lifts one part at a time from the top of the stack. This approach is better for parts that are too flat to self-orient, parts with sensitive surfaces that cannot tolerate bulk tumbling, or parts that arrive from the cutting process in a stacked format (for example, laser-cut parts that are stacked by the cutting machine).
Sheet-fed systems are slower but gentler. Bowl-fed systems are faster but more aggressive. The choice depends on the part's tolerance for surface contact and the required feed rate.
| Feeding method | Typical rate (ppm) | Part handling | Surface protection | Variant flexibility | Best for |
|---|---|---|---|---|---|
| Dedicated bowl feeder | 30 - 200 | Bulk tumbling | Moderate (coating-dependent) | Low (one variant) | High-volume, stable geometry |
| Flexible feeder + vision | 10 - 60 | Bulk, gentle spread | Good (soft pick pad) | High (recipe-based) | Multiple variants, complex outlines |
| Sheet-fed magazine | 5 - 30 | Stack lift, no tumbling | Excellent | Medium (magazine swap) | Flat parts, sensitive surfaces |
| Tray-fed (Nest pallet) | 5 - 20 | Pre-placed, zero tumbling | Excellent | High (tray swap) | Precision parts, zero-surface-contact |
Progressive die stamping integration
When the feeding system is integrated directly with a progressive die stamping press, the feeder receives parts at the cadence of the press cycle. This is typically faster than off-line feeding because the parts go directly from the die to the feeder without intermediate bulk handling.
A die-integrated feeder usually receives parts on a short conveyor or a slide chute from the press bed. The feeder's role is to orient the part and present it to the next station, which may be a secondary forming operation, a threading station, or an assembly robot.
The key design consideration for progressive die integration is the part state at the handoff point. Parts that drop from the die may be hot, oily, and still carrying slug fragments. The feeder track must be designed for these conditions. Heat-resistant coatings, oil-tolerant track angles, and a slug-removal screen at the intake point are standard requirements.
For progressive lines that produce multiple part types from the same die family, the feeder should support quick changeover between part-specific orientation inserts. Huben's quick-change tooling systems are commonly used in progressive die applications where the feeder must switch between bracket variants without a full teardown.
Handling oily stamped parts and track coating selection
Stamped parts almost always carry drawing oil, stamping lubricant, or rust preventive. The oil reduces friction between the part and the track surface, which can cause parts to slide backward on the bowl ramp instead of climbing forward. It also causes parts to stick together, creating double-feeds and jams at narrow track sections.
Track coating selection is the primary defense against oil-related feeding problems. Teflon (PTFE) coating is the standard choice for oily parts because it maintains low friction between the coating and the part, reducing the tendency for parts to stick to the track or to each other. Polyurethane (PU) coating provides more grip and is useful when the oily part tends to slip excessively on Teflon.
The track angle also matters. A steeper track angle increases the forward component of the vibration, which helps oily parts climb despite reduced friction. But a steeper angle also increases part velocity and impact force, which can damage sensitive edges. The optimal angle is typically determined during the feasibility test with actual production-condition parts.
For lines where oil removal is part of the process, a pre-feed washing or blow-off station should be included upstream of the feeder. A simple compressed-air blow-off removes excess oil and significantly improves feeding consistency.
Practical design rules for stamped and laser-cut part feeders
- Map all stable poses before designing the track. Place 50 parts on a flat surface and record how they naturally settle. This tells you how many orientations the track must resolve.
- Identify the burr face and direction. If the burr is consistent, design the track to use it as an orientation feature. If it is inconsistent, design the track to tolerate it.
- Test with production-condition parts, not cleaned samples. Oil, burrs, and micro-joins are part of the application, not defects in the sample.
- Plan for surface protection from the start. If the part has a cosmetic face or a mating surface, specify it early so the track can avoid contact with that area.
- Design the discharge to match the station, not the bowl. The last 10 cm of track are the most important because they define the presentation pose that the next station receives.
- Include recirculation for mis-oriented parts. A part that fails orientation should return to the bowl for another attempt, not be ejected as scrap.
Buyer checklist before requesting a quote
- Send actual production parts with oil and burrs intact. Cleaned or hand-selected samples do not represent the real feeding condition.
- Specify the burr face and approximate burr height. This determines whether the burr can be used as an orientation feature.
- State whether parts arrive with micro-joins or skeleton fragments. This determines whether a pre-separation stage is needed.
- Define the required presentation pose at the downstream station. The feeder must deliver the part in this exact orientation.
- Include variant count and changeover frequency. This determines whether a dedicated bowl, a flexible feeder, or a sheet-fed system is appropriate.
- Note any surface protection requirements. Cosmetic faces, sealing surfaces, and adhesive bonding areas must be identified.
Huben Automation designs feeding systems for stamped and laser-cut parts that address burr direction, micro-join separation, and station-ready orientation. If your team is evaluating a flat part feeding application, send us the sample parts and station requirements for a feasibility review.
Frequently asked questions
How do I handle stamped parts where the burr direction varies across the production lot?
When burr direction is inconsistent, the feeder cannot rely on the burr as an orientation mechanism. The track should be designed with clearances wide enough to avoid catching on the burr, and orientation should be handled by other means such as edge geometry profiling or a vision system at the pickup point. If burr variation is causing feeding failures, the root cause is likely in the stamping die maintenance, and addressing the die condition upstream is more effective than adapting the feeder.
How do I ensure both faces of a flat laser-cut part end up in the correct orientation?
Truly flat parts with identical faces on both sides are among the most challenging to orient mechanically because gravity provides no bias toward one face. The most reliable approach is a flexible feeder with a vision system that identifies the part's face orientation at pickup. The robot or pick mechanism then rotates the part as needed to present the correct face to the downstream station. For high-volume applications, a bowl feeder with a mechanical flipper mechanism can work, but it requires careful tuning and is less flexible than the vision-based approach.
My laser-cut parts still have micro-tabs connecting them. Will they feed properly?
Micro-joined parts should be separated before entering the orientation feeder. A gentle vibratory pre-separation stage can break remaining micro-tabs without damaging the parts. If the tabs are too strong, a mechanical break-off station or a return to the laser cutter for improved knockout is needed. Feeding micro-joined parts directly into a bowl creates clusters that cannot be oriented and often jams the track.
Can a vibratory feeder handle heavily oiled stamped parts?
Yes, with the right coating and track design. Teflon-coated tracks are the standard choice for oily parts because they reduce sticking between the part and the track surface. A steeper track angle increases the forward drive component to compensate for reduced friction. For heavily oiled parts, a compressed-air blow-off station upstream of the feeder removes excess oil and significantly improves feeding consistency. Always test with the actual oil condition from production, not cleaned samples.
When should I choose a sheet-fed system over a bowl feeder for flat parts?
Choose a sheet-fed system when the parts arrive stacked from the cutting process, when the part surface cannot tolerate any tumbling contact, or when the part is too flat to self-orient reliably in bulk. Sheet-fed systems are slower (typically 5-30 ppm) but provide excellent surface protection and predictable part presentation. Choose a bowl feeder when the part can tolerate bulk handling, the volume is high, and the orientation can be solved with track tooling or a vision system.
How do I integrate a feeder with a progressive die stamping press running at high speed?
For high-speed progressive die integration, the feeder receives parts directly from the press via a conveyor or slide chute. The feeder track must handle hot, oily parts and remove slug fragments at the intake. A heat-resistant coating, an oil-tolerant track angle, and a mesh screen for slug removal are standard. If the die produces multiple part variants, the feeder should support quick-change orientation inserts to minimize changeover time. Huben's quick-change tooling systems are designed for this application.
Ready to Automate Your Production?
Get a free consultation and detailed quote within 12 hours from our engineering team.


