Vibratory Feeder Controller Guide: Settings, Tuning & Performance Optimization
What Is a Vibratory Feeder Controller?
A vibratory feeder controller is an electronic device that regulates the electromagnetic drive unit of a vibratory feeder, controlling the vibration frequency, amplitude, and voltage to achieve precise and consistent parts feeding. Without a properly configured controller, even the best-designed bowl feeder will deliver inconsistent feed rates, cause part jamming, or damage sensitive components.
Think of the controller as the brain of your vibratory feeding system. While the bowl, tooling, and drive unit provide the mechanical structure, the controller determines how effectively that structure performs. A well-tuned controller can increase feed rate by 30-50%, reduce part damage, and extend equipment life by minimizing unnecessary vibration stress.
Types of Vibratory Feeder Controllers
Modern vibratory feeder controllers fall into three main categories, each with distinct advantages and use cases. Understanding these differences is essential for selecting the right controller for your application.
Analog Controllers
Analog controllers are the traditional workhorse of vibratory feeding. They use simple potentiometer-based circuits to adjust voltage and frequency, providing basic on/off control and amplitude adjustment through a dial or knob.
- Advantages: Low cost, simple operation, reliable in harsh environments, no programming required
- Limitations: No feedback loop, drift over time, limited precision, no data output
- Typical price: $50 - $200
- Best for: Simple, single-part feeding applications where precision is not critical
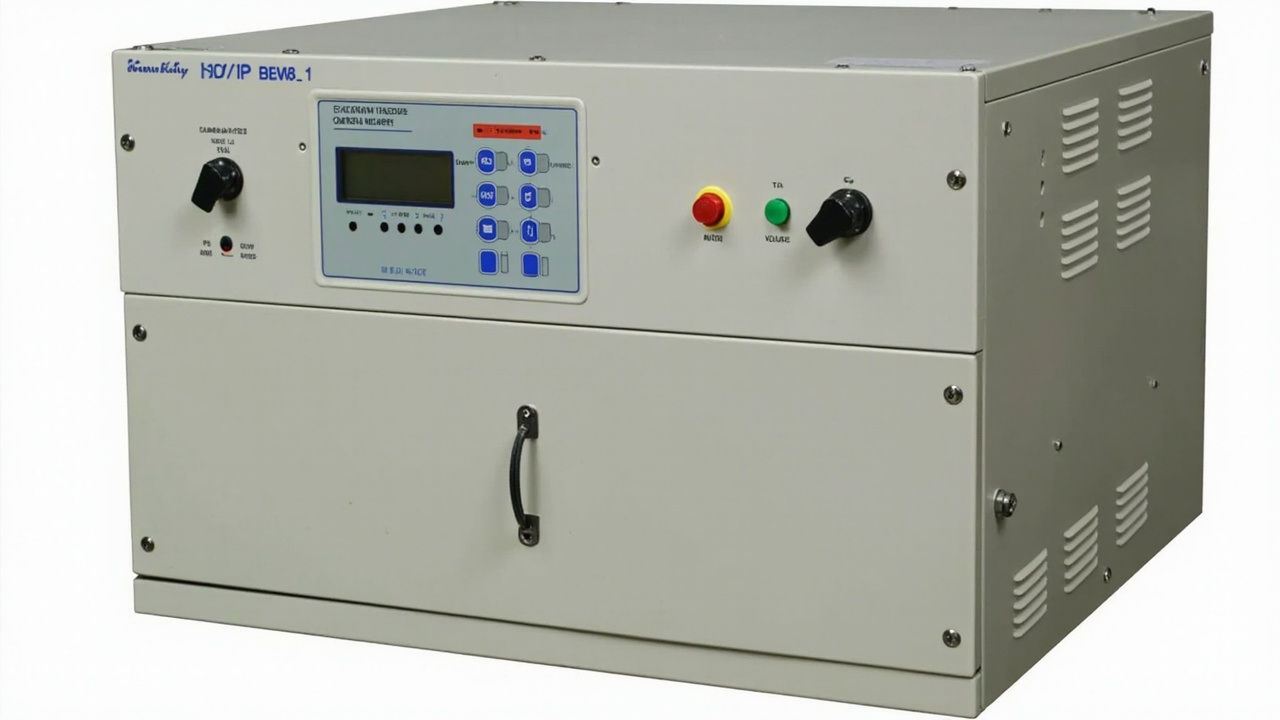
Digital Controllers
Digital controllers use microprocessor-based circuits with closed-loop feedback to maintain precise control over vibration parameters. They typically feature digital displays, programmable presets, and automatic frequency tracking that compensates for load changes and mechanical drift.
- Advantages: Precise control, auto-tuning, multiple presets, feedback monitoring, alarm outputs
- Limitations: Higher cost, requires basic programming knowledge, more sensitive to electrical noise
- Typical price: $200 - $800
- Best for: Precision feeding, multi-speed applications, quality-critical production
PLC-Integrated Controllers
PLC-integrated controllers connect directly to your production line's programmable logic controller, enabling full automation of feeder operation. They support industrial communication protocols (Modbus, Profinet, EtherNet/IP) and allow the feeder to respond dynamically to upstream and downstream machine states.
- Advantages: Full automation integration, real-time monitoring, data logging, remote control, predictive maintenance
- Limitations: Highest cost, requires PLC programming expertise, longer setup time
- Typical price: $500 - $2,000 (including integration)
- Best for: Fully automated production lines, Industry 4.0 applications, multi-feeder systems
| Feature | Analog Controller | Digital Controller | PLC-Integrated |
|---|---|---|---|
| Control precision | Low (manual) | High (closed-loop) | Very high (feedback + logic) |
| Frequency adjustment | Fixed or manual | Auto-tracking | Auto + remote setpoint |
| Amplitude control | Potentiometer dial | Digital preset | PLC-driven setpoint |
| Feedback monitoring | None | Current, amplitude | Full process data |
| Communication | None | RS-485 / Modbus | Profinet, EtherNet/IP |
| Preset storage | None | 4-8 presets | Unlimited (via PLC) |
| Alarm outputs | Basic overload | Multi-condition | Full diagnostics |
| Price range | $50 - $200 | $200 - $800 | $500 - $2,000 |
Huben Expert Tip
When optimizing your production line, always consider the long-term ROI of factory-direct equipment over cheaper short-term alternatives. Quality components drastically reduce downtime.
Key Controller Parameters You Must Understand
Three fundamental parameters determine how your vibratory feeder performs. Mastering these is the foundation of effective controller tuning.
Frequency
Frequency refers to the number of vibration cycles per second, measured in Hertz (Hz). Most vibratory feeders operate in the range of 50-120 Hz. The optimal frequency depends on the resonant frequency of your feeder's spring-mass system.
- Too low: Parts move sluggishly, inconsistent feeding, possible stalling
- Too high: Parts bounce erratically, increased noise, excessive wear on springs and tooling
- Optimal: Parts advance smoothly with minimal back-slide, consistent feed rate, quiet operation
Digital controllers with auto-frequency tracking can find the resonant frequency automatically, which is a significant advantage over analog systems that require manual tuning.
Amplitude
Amplitude measures the magnitude of vibration displacement, typically expressed in millimeters (mm) or micrometers (μm). It directly controls how far parts advance with each vibration cycle, and therefore determines the feed rate.
- Too low: Parts do not advance, feeder appears dead, no output
- Too high: Parts bounce over tooling, orientation failures, potential part damage
- Optimal: Parts advance steadily at the target feed rate with correct orientation
Typical amplitude settings range from 0.3 mm to 1.5 mm depending on part size and weight. Smaller, lighter parts require lower amplitude; larger, heavier parts need higher amplitude to overcome friction and gravity on the track.
Voltage and Current
The controller supplies voltage to the electromagnetic coils, which generates the vibration force. Input voltage typically ranges from 110V to 240V AC, while the controller regulates the output to the coils. Current draw indicates the load on the drive unit:
- Normal current: Feeder operating within design parameters
- High current: Overloaded bowl, jammed parts, or mechanical binding
- Low current: Broken coil wire, loose connection, or controller fault
Monitoring current is one of the most effective ways to detect feeder problems early. Digital and PLC-integrated controllers provide real-time current monitoring with threshold alarms.
Step-by-Step Vibratory Feeder Controller Tuning Process
Follow this systematic procedure to tune your vibratory feeder controller for optimal performance:
Step 1: Preparation
- Ensure the feeder is securely mounted on a rigid, level surface
- Verify all mounting bolts are tight and spring packs are properly installed
- Clear the bowl of all parts and debris
- Confirm the controller is connected to the correct drive coil(s)
- Set the controller to its lowest output setting before powering on
Step 2: Find the Resonant Frequency
- Start the controller at minimum amplitude
- Slowly increase the frequency while observing the bowl vibration
- Listen for the point where vibration feels strongest and the bowl produces a clear, resonant tone — this is the mechanical resonant frequency
- If using a digital controller with auto-tracking, activate the auto-tune function and let it find the resonant point
- Lock in this frequency as your baseline operating point
Step 3: Set the Amplitude
- With the resonant frequency locked, slowly increase the amplitude
- Add a small quantity of parts to the bowl
- Observe part movement on the track — parts should advance smoothly without bouncing
- Adjust amplitude until parts move at the desired feed rate
- Verify that parts maintain correct orientation through the tooling sections
Step 4: Fine-Tune Under Load
- Fill the bowl to its normal operating level with parts
- Re-check the frequency — heavy loads can shift the resonant point slightly
- Adjust amplitude to maintain the target feed rate under full load
- Run the feeder for 15-30 minutes and verify stable performance
- Check for hot spots on the coil housing (indicates over-driving)
Step 5: Set Limits and Alarms
- On digital or PLC controllers, set the maximum current limit (typically 10-20% above normal operating current)
- Configure low-amplitude alarm to detect spring failure or coil degradation
- Set the minimum feed rate threshold if using a parts-per-minute sensor
- Document all settings for future reference and maintenance
Common Tuning Mistakes and How to Avoid Them
Even experienced technicians make these errors when tuning vibratory feeder controllers:
Mistake 1: Over-Driving to Compensate for Mechanical Issues
When a feeder is not performing well, the instinct is often to increase amplitude and frequency. However, if the root cause is worn springs, damaged tooling, or a loose mounting, over-driving will only accelerate wear and waste energy. Always inspect the mechanical condition before adjusting controller settings upward.
Mistake 2: Ignoring the Resonant Frequency
Operating far from the resonant frequency forces the electromagnetic coils to work harder, generating excess heat and consuming more power while delivering less vibration energy to the bowl. Always tune to resonance first, then adjust amplitude for the desired feed rate.
Mistake 3: Tuning Without Parts in the Bowl
An empty bowl has a different resonant frequency than a loaded bowl. The weight of the parts shifts the resonant point, sometimes by 5-10 Hz. Always perform final tuning with the normal part load in the bowl.
Mistake 4: Neglecting Spring Pack Condition
Worn or fatigued springs change the resonant frequency and reduce vibration efficiency. If you find yourself constantly increasing controller output to maintain the same feed rate, inspect and replace the spring packs before making further controller adjustments.
Mistake 5: Skipping Documentation
When a feeder is running well, document the controller settings immediately. If performance degrades later, having baseline settings makes troubleshooting much faster. Record frequency, amplitude percentage, current draw, and feed rate.
Advanced Optimization Techniques
Once your feeder is properly tuned, these advanced techniques can push performance even further:
Dual-Speed Operation
Many digital controllers support two or more preset speed levels. Use a high-speed preset for rapid bowl filling when the downstream machine is ready, and a low-speed preset for precise feeding when parts are near the exit. This reduces part recirculation and orientation failures while maintaining high average throughput.
Soft-Start and Soft-Stop
Instead of abrupt on/off switching, soft-start gradually ramps up vibration over 1-3 seconds, and soft-stop ramps down over 0.5-2 seconds. This prevents parts from being thrown off the track during startup and reduces mechanical shock to the spring system, extending equipment life.
Amplitude Compensation
Advanced digital controllers can automatically compensate for load changes. As the bowl empties, the controller slightly reduces amplitude to maintain consistent feed rate. As parts are replenished, amplitude increases to handle the heavier load. This ensures steady output regardless of bowl fill level.
Phase Control for Linear Feeders
Linear vibratory feeders (conveyor tracks) often use two coils that must be driven in proper phase relationship. Advanced controllers allow independent phase adjustment for each coil, enabling fine-tuning of the directional vibration vector for optimal part advancement.
Predictive Maintenance Monitoring
PLC-integrated controllers can track operating parameters over time and detect gradual degradation before it causes a production stoppage. Monitor these trends:
- Increasing current at constant amplitude — Indicates mechanical binding or spring fatigue
- Decreasing amplitude at constant voltage — Suggests coil degradation or loose connections
- Frequency drift — Points to spring pack wear or mounting looseness
Troubleshooting Common Controller Issues
| Symptom | Likely Cause | Solution |
|---|---|---|
| Feeder does not vibrate | No power, blown fuse, disconnected coil | Check power supply, replace fuse, verify coil connections |
| Weak vibration, low output | Wrong frequency, worn springs, low voltage | Re-tune frequency, replace springs, check input voltage |
| Intermittent operation | Loose wiring, overheating, faulty controller | Inspect all connections, check for overheating, replace controller |
| Excessive noise | Over-driving, loose mounting, worn springs | Reduce amplitude, tighten mounting, replace springs |
| Inconsistent feed rate | Load variation, frequency drift, tooling wear | Enable amplitude compensation, re-tune, inspect tooling |
| Controller overheating | Over-driving, poor ventilation, coil short | Reduce output, improve ventilation, check coil resistance |
| Parts not orienting | Amplitude too high, tooling issue, wrong frequency | Reduce amplitude, inspect tooling, verify frequency |
Integration with Production Line PLCs
Integrating your vibratory feeder controller with a production line PLC enables fully automated operation and real-time monitoring. Here is a practical approach to PLC integration:
Communication Setup
Most modern digital controllers support Modbus RTU over RS-485 as a standard communication protocol. For higher-level integration, Profinet or EtherNet/IP may be available. Configure the controller's communication parameters (baud rate, slave address, parity) to match your PLC's settings.
Key PLC Control Signals
- Start/Stop command — PLC controls feeder operation based on downstream demand
- Speed setpoint — PLC adjusts feed rate based on production requirements
- Part presence signal — Sensor at feeder exit confirms parts are being delivered
- Bowl level signal — Capacitive or photoelectric sensor monitors parts level in the bowl
- Alarm acknowledgment — PLC receives and logs controller alarm conditions
Automation Logic Example
A typical PLC program for feeder control follows this logic:
- When the downstream machine signals "ready for parts," the PLC starts the feeder at high speed
- When a part presence sensor detects a part at the escapement, the PLC slows the feeder to low speed
- After the part is picked or assembled, the PLC returns the feeder to high speed
- If the bowl level sensor indicates low parts, the PLC triggers a hopper elevator to refill the bowl
- If the controller reports an alarm, the PLC stops the feeder and alerts the operator
This demand-driven approach minimizes part recirculation, reduces wear, and ensures parts are always available when needed without over-feeding.
Why Choose Huben Automation for Your Feeder Controller Needs
With over 20 years of experience in vibratory feeding technology and ISO 9001 certified quality management, Huben Automation provides complete controller solutions backed by deep application expertise:
- Factory-direct pricing — No middleman markup on controllers and feeder systems
- Pre-configured controllers — Every feeder ships with a controller tuned for your specific application
- Multiple controller options — Analog, digital, and PLC-integrated controllers to match your automation level
- Remote support — Our engineers can assist with controller tuning and troubleshooting via video call
- 12-month warranty with lifetime technical support on all controller and feeder systems
Whether you need a simple analog controller for a single feeder or a fully integrated PLC system managing multiple feeding stations, Contact Huben Automation for expert guidance and competitive pricing.


