Feeder Line Layout Design Guide: Positioning, Spacing, and Flow Optimization

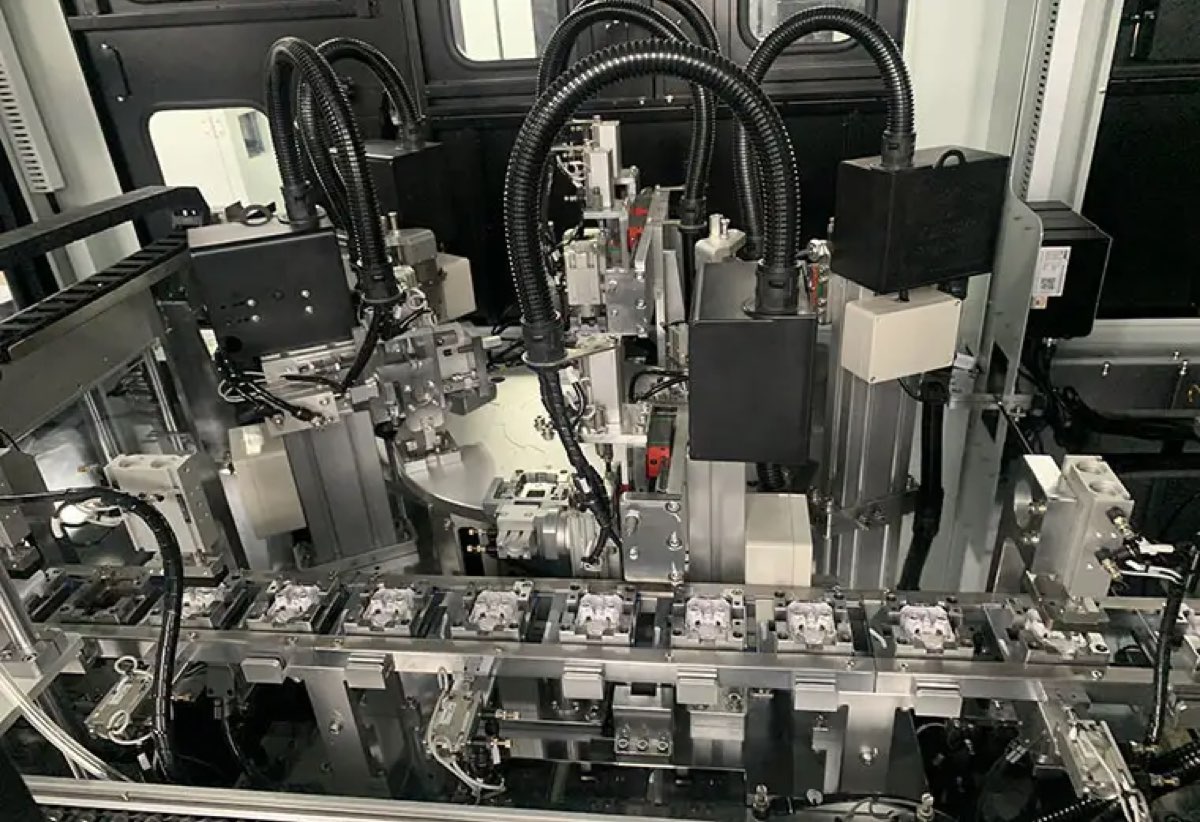
Feeder placement affects ergonomics, maintenance, and line efficiency more than most teams plan for
A parts feeding system does not operate in isolation. It sits in a physical environment alongside operators, assembly stations, conveyors, robots, and utility infrastructure. Where the feeder is placed, how much space surrounds it, and how material flows into and out of it all determine whether the system works smoothly in production or becomes a constant source of interference.
Most feeder layout problems are not discovered during commissioning. They appear over weeks and months: operators who cannot reach the refill point without climbing over guarding, maintenance technicians who need two hours to access a spring pack because the feeder is wedged against a wall, gravity tracks that are too long or too short because the discharge height was never coordinated with the assembly machine entrance.
This guide covers the positioning principles, spacing rules, and flow optimization strategies that make feeder line layouts work in practice. It complements our cycle time balancing guide and site preparation checklist for a complete approach to feeding system integration.
Positioning principles for feeder stations
Feeder positioning should be driven by three priorities in order: operator ergonomics, material flow, and maintenance access. When these conflict — and they often do — the layout must find a compromise rather than sacrificing one entirely.
Operator reach and refill access
The most frequent operator interaction with a feeder is refilling the bowl or hopper. This happens multiple times per shift on most lines, and it must be possible without awkward reaching, climbing, or removing guarding. The refill point should be within the operator's normal reach zone — roughly 400-800 mm from the standing position at the operator station.
For hopper-elevator systems, the hopper opening should be between 900 mm and 1300 mm above floor level. Below 900 mm requires bending. Above 1300 mm requires lifting parts above shoulder height. Both positions increase fatigue and the risk of spillage or injury over an 8-hour shift.
The refill path must be clear of cable trays, pneumatic lines, and guarding panels. If the operator has to step over or reach around obstacles to refill, the layout needs revision. This sounds obvious, but it is one of the most common problems found during production audits of newly installed feeding lines.
Sight line and monitoring
Operators need to see the bowl or hopper level without leaving their primary work position. If the feeder is positioned behind a machine frame, inside an enclosure, or facing away from the operator station, the operator cannot monitor fill level and will either overfill (causing jams) or underfill (causing starvation).
Position the feeder so the bowl interior is visible from the operator's normal standing position. If this is not possible due to space constraints, install a level sensor with a visual indicator (light tower or HMI display) at the operator station. The sensor is a supplement, not a replacement for direct visibility.
Material flow direction
Parts should flow from the feeder to the assembly station in the most direct path possible. Every bend, transition, or direction change in a gravity track introduces a potential jam point and reduces feed reliability. The ideal layout places the feeder discharge directly above or adjacent to the assembly station entrance, with a straight gravity track between them.
When a straight path is not possible, limit gravity track bends to a maximum of two direction changes. Each bend should have a minimum radius of 3× the largest part dimension and should be accessible for clearing jams. Avoid S-bends and vertical drops followed by horizontal runs — these are the most common jam locations in production.
Spacing between feeders and stations
Inadequate spacing is the single most common layout mistake in feeding lines. Teams optimize for floor space during design and discover during production that the space is too tight for real-world operation.
| Clearance area | Minimum dimension | Recommended dimension | Reason |
|---|---|---|---|
| Behind feeder (maintenance access) | 600 mm | 800-1000 mm | Spring pack adjustment, controller access, drive inspection |
| Side of feeder (tooling access) | 400 mm | 600 mm | Tooling adjustment, air jet positioning, sensor alignment |
| Above feeder (bowl removal) | 300 mm | 500 mm | Bowl lift-off for cleaning or changeover |
| Refill side (operator access) | 600 mm | 800 mm | Comfortable refill motion without obstruction |
| Between adjacent feeders | 500 mm | 700-900 mm | Independent access, cross-contamination prevention |
| Gravity track run-out | 150 mm beyond discharge | 300 mm beyond discharge | Part containment, jam clearing, sensor mounting |
These dimensions assume a single feeder serving one station. When multiple feeders serve a single assembly station — common in multi-component assembly — the spacing must also account for the interaction between feeders. Feeders that share a gravity track, escapement, or robot pick point need enough separation that tooling on one feeder does not interfere with access to the other.
Gravity track routing and design
The gravity track is the connection between the feeder and the assembly station, and its design has an outsized effect on feeding reliability. A well-designed gravity track delivers parts consistently. A poorly designed one is the most common source of jams and misfeeds in the entire system.
Track angle and length
Gravity tracks for vibratory feeder discharge typically use angles of 8-15° from horizontal. Shallower angles (8-10°) work for parts with low friction — machined metal parts, coated components. Steeper angles (12-15°) are needed for parts with higher friction or for tracks with multiple bends where parts lose momentum at direction changes.
Track length should be minimized. Every 100 mm of track length adds a potential jam point and increases the time between a part leaving the feeder and arriving at the assembly station. For most applications, the gravity track should be 200-600 mm long. Longer tracks require intermediate vibration (inline feeders) to maintain part flow.
Track cross-section and part containment
The track cross-section must match the part geometry and orientation. Too wide, and parts can rotate or flip during transit. Too narrow, and parts jam. The standard guideline is track width = 1.2-1.5× the maximum part width in the running orientation, with guide rails or walls that prevent rotation without creating pinch points.
For parts that must maintain a specific orientation during transit — such as screws that must remain head-up — the track should include orientation-maintaining features: V-grooves for cylindrical parts, keyways for asymmetric parts, or rail constraints for flat parts. These features add cost but prevent the most common transit-related misfeeds.
Transitions and bends
Every transition point — where the track changes angle, direction, or cross-section — is a potential jam location. Design transitions with generous lead-in angles (15-30°), smooth radius curves (minimum 3× largest part dimension), and no sharp edges or steps in the track floor.
At each bend, provide an access point for jam clearing. This can be a removable cover, an access slot, or simply enough surrounding clearance for a technician to reach the bend with a probe. Bends that are enclosed or inaccessible are the ones that cause the longest downtime when they jam.
Hopper refill ergonomics
When a feeder includes a hopper elevator, the refill ergonomics become even more important because the hopper holds a larger volume and the refill action is more physically demanding. The operator typically lifts a container of parts and pours or dumps them into the hopper opening.
- Hopper opening height: 900-1300 mm above floor level. Below 900 mm requires bending with a heavy container. Above 1300 mm requires lifting above shoulder height.
- Opening size: At least 200 mm × 200 mm, or large enough to accept the standard parts container without precise alignment. Small openings that require careful pouring slow the refill and increase spillage.
- Container weight: If the standard parts container exceeds 10 kg when full, provide a mechanical assist (hoist, lift table, or tilting cradle) at the refill point. Manual lifting of heavier containers violates ergonomic guidelines in most jurisdictions and causes fatigue-related errors.
- Spill containment: Provide a tray or catch basin below the hopper opening to contain spillage. Spilled parts on the floor create housekeeping problems, quality risks, and slip hazards.
Maintenance access clearance
Maintenance access is the layout priority most often sacrificed during design, and the one that causes the most frustration during production. The key maintenance actions that must be possible without moving the feeder or disassembling adjacent equipment are:
- Spring pack adjustment: The most frequent maintenance action. Requires access to the rear or side of the feeder where the spring packs are mounted. Minimum 600 mm clearance behind the feeder; 800-1000 mm recommended for comfortable wrench access.
- Controller access: The vibratory feeder controller should be mounted within arm's reach of the feeder, visible from the adjustment position, and not blocked by other equipment. If the controller is in a remote cabinet, the cable run should be labeled and the cabinet accessible without keys or special tools during normal operation.
- Bowl removal: For cleaning, changeover, or recoating, the bowl must be removable. This requires 300-500 mm clearance above the bowl rim and a clear vertical lift path. If the feeder is under a mezzanine, shelf, or overhead conveyor, verify that the bowl can be lifted out before finalizing the layout.
- Tooling adjustment: Air jets, sensors, wiper blades, and escapements all require periodic adjustment. Each must be reachable from the operator or maintenance side of the feeder without reaching across the bowl or under the track.
- Drive unit inspection: The electromagnetic drive unit under the bowl should be accessible for visual inspection and coil resistance measurement. This typically requires access from below or behind the feeder.
Electrical and pneumatic routing
Utility routing is not glamorous, but it determines whether the feeder installation is clean and maintainable or a tangle of cables and hoses that creates trip hazards, interference, and difficulty tracing faults.
Electrical routing: Run feeder power cables, sensor cables, and communication cables in dedicated cable trays or conduits, separate from high-power lines (motor drives, heaters) that can cause electromagnetic interference. Use plug connectors at the feeder rather than hardwired connections — this allows the feeder to be disconnected and removed without an electrician. Label both ends of every cable.
Pneumatic routing: If the feeder uses air jets, escapements, or blow-offs, route the air supply through a dedicated manifold with a pressure regulator and filter at the feeder location. Avoid long runs of flexible hose that can be pinched, kinked, or accidentally disconnected. Use push-to-connect fittings with locking collars for reliability. Install a shut-off valve at the manifold so the air supply can be isolated without shutting down the factory main.
Cable and hose management: Keep all cables and hoses below the working surface height (typically below 800 mm) or above head height (above 2000 mm). Cables at working height create snag points for operators and forklifts. Use cable chains or flexible conduits for any cables that move with the feeder during adjustment or changeover.
Layout review checklist
Before finalizing any feeder line layout, verify each of the following items. This checklist catches the most common problems before they become expensive field modifications.
- Operator refill path is clear and within ergonomic reach. No obstacles between the operator station and the bowl or hopper opening.
- Bowl or hopper level is visible from the operator position. Direct line of sight or reliable level indicator with local display.
- Maintenance access meets minimum clearance requirements. At least 600 mm behind the feeder, 400 mm on the tooling side, 300 mm above the bowl.
- Gravity track is as short and straight as possible. Maximum two direction changes, minimum 3× part-dimension bend radius.
- Discharge height matches the assembly station entrance. Verify with actual dimensions, not nominal drawings.
- Electrical and pneumatic connections use plug connectors and dedicated routing. No shared cable trays with high-power lines, no loose hoses at working height.
- Spill containment is provided below the hopper and at the discharge. Trays or catch basins that prevent parts from reaching the floor.
- Adjacent feeders have independent access. Maintenance on one feeder does not require shutting down or moving another.
Key takeaways
- Position for the operator first. Refill access and bowl visibility are the most frequent daily interactions. If the operator cannot refill easily and see the bowl level, the layout will cause problems from day one.
- Reserve enough space for maintenance. 600 mm behind the feeder is the absolute minimum. 800-1000 mm is what maintenance teams actually need to work efficiently.
- Minimize gravity track length and bends. Every bend is a potential jam point. Every 100 mm of track adds transit time and failure risk.
- Route utilities cleanly and separately. Power, signal, and pneumatic lines should be in dedicated trays with plug connectors at the feeder. This pays back every time the feeder needs adjustment or removal.
- Verify the layout against the checklist before installation. Most layout problems are obvious on paper if someone looks for them. They become expensive only when they are discovered on the production floor.
Frequently Asked Questions
How much space should I leave around a bowl feeder?
At minimum, allow 600 mm behind the feeder for spring pack and controller access, 400 mm on the tooling side for adjustment, 300 mm above for bowl removal, and 600 mm on the refill side for operator access. Recommended dimensions are larger: 800-1000 mm behind, 600 mm on the side, and 800 mm for refill. These dimensions assume a single feeder; add 500-900 mm between adjacent feeders for independent access.
What is the ideal gravity track angle for parts feeding?
For most machined metal parts, 8-10° from horizontal provides sufficient flow. For parts with higher friction — rubber, coated components, or parts with sticky residues — use 12-15°. The track should be as short as possible (200-600 mm typical) with no more than two direction changes. If the track must be longer than 600 mm, add an inline vibratory feeder to maintain part momentum.
How high should the hopper opening be for comfortable refilling?
Between 900 mm and 1300 mm above floor level. Below 900 mm requires the operator to bend with a heavy container, which causes fatigue and increases spillage risk. Above 1300 mm requires lifting above shoulder height, which is an ergonomic hazard for containers over 5 kg. If the standard parts container exceeds 10 kg when full, provide a mechanical assist at the refill point.
Can two feeders share a gravity track?
It is possible but generally not recommended. Shared gravity tracks create a single point of failure — a jam in the shared section stops both feeders. They also make it difficult to track which feeder caused a quality or count problem. If sharing is necessary due to space constraints, use a merge section with a mechanical gate that allows only one feeder to discharge at a time, and provide clear access to the merge point for jam clearing.
How do I coordinate feeder discharge height with the assembly station entrance?
Measure the assembly station entrance height with the machine in its operating position, not from the machine drawing. Then work backward: assembly entrance height + gravity track angle × track length = required feeder discharge height. Adjust the feeder stand or table height to match. Verify the calculation with the actual feeder and track during installation — a 20 mm height mismatch can cause parts to jam at the transition or arrive with insufficient momentum.
What utility preparation is needed before feeder installation?
Confirm the correct power supply (voltage, phase, grounding) for the feeder controller and any auxiliary equipment. Provide a dedicated compressed air connection with regulator, filter, and shut-off valve if the feeder uses air jets or pneumatic escapements. Route network or communication cables if the feeder integrates with a PLC or SCADA system. Install cable trays or conduits before the feeder arrives — retrofitting utility routing around an installed feeder is significantly more difficult and expensive. For a complete pre-installation checklist, see our site preparation guide.
Ready to Automate Your Production?
Get a free consultation and detailed quote within 12 hours from our engineering team.